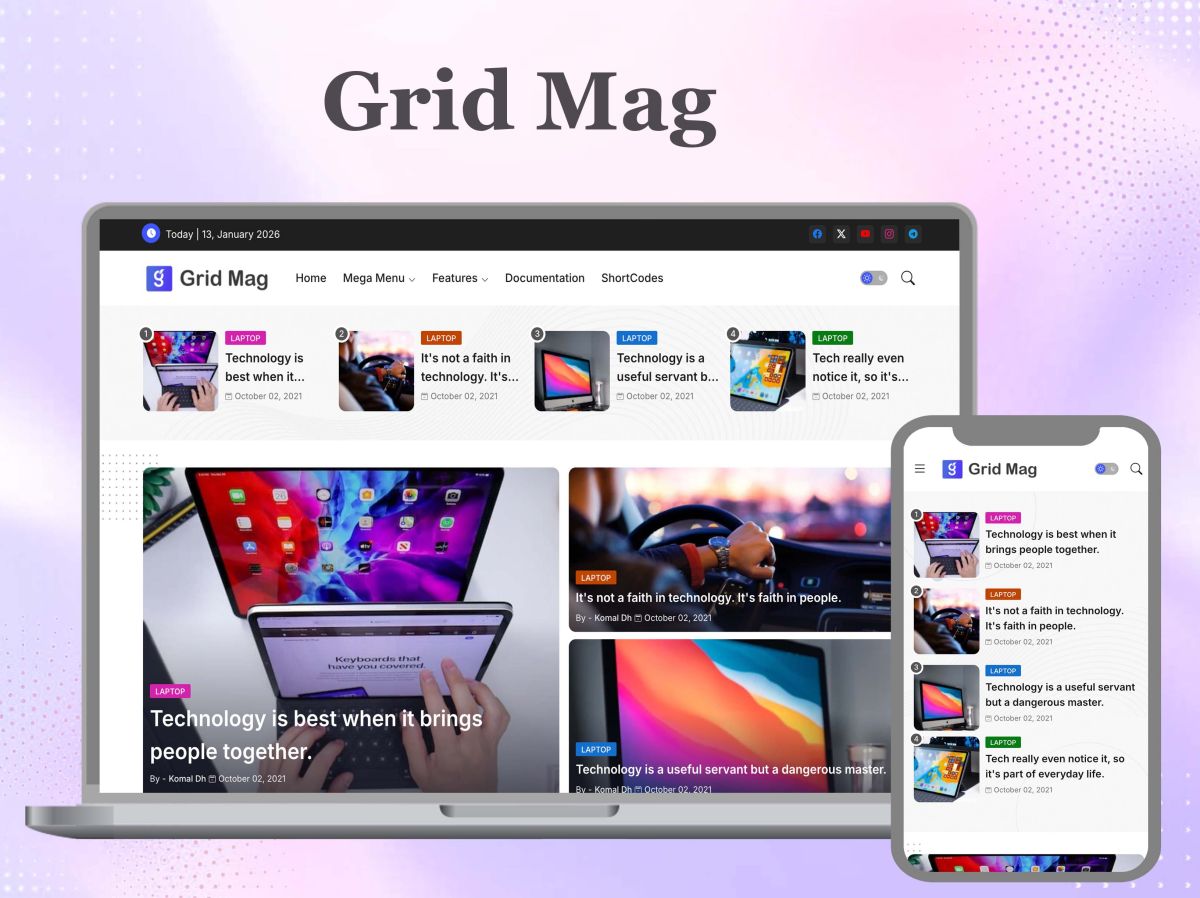
Every one of the Blogger themes that I have sold works within a specific limit. The template allows control over HTML, CSS and JavaScript in the browser, but it is not capable of executing a single line of code on the server; and since I have been developing within those limits for many years, I am fully aware of the point at which it stops. WordPress, on the other hand, does not have such a limit, which is the reason it warrants a careful answer to the question of what custom development can contribute to it.
I have created and sold more than 60 commercial themes via Piki Templates, and it is from this experience that my expertise has grown to cover WordPress, APIs, automation, third-party integrations, and security as well as performance optimisation. It is the range of areas in which I have worked that has caused me to write this article. Instead of listing every single thing that WordPress is technically capable of, I am concentrating on the features which solve real-world problems—those that I would rather buy than develop—and I’ll explain how you can test a feature before introducing it to a live site.
Start With the Job, Then Open the Plugin Directory
One should not begin by asking “which plugin should I install?” but rather ask “what exactly should this website do?”, because the answer to that question will decide whether a plugin, a forty-line snippet or a full build is needed.
If a well-developed plugin already does its job reliably, then go with it; custom development only makes sense when three or four plugins have to be combined in order to achieve an approximate result, when a plugin carries out most of the task but not the part that the business is concerned with, or when the requirement is simply unusual.
It was with regard to templates that I first learned this lesson—although it is easy to add a feature to a theme, it is a far more difficult matter to decide whether a real visitor will ever make use of it. The same discipline is needed in WordPress development, and it is exactly because this point is overlooked that websites end up with features that nobody asked for.
Forms That Answer Back
Text is collected using a contact form, while a custom form can send a response. The visitor chooses a service, ticks two add-ons, uploads a reference file, and then the page shows an estimate before the form is submitted.
The first section consists of JavaScript and, as I’ve written a good deal of it, I can say that it should stay small since all it needs to do is to read the input values, calculate a number and put that number into one of the elements. The second part is what makes WordPress valuable. In order to achieve this, a handler must be registered either through admin-post.php or by using register_rest_route(), the nonce must be verified with wp_verify_nonce(), each field must be sanitised using sanitize_text_field() or absint(), and the estimate then has to be recalculated in PHP. The figure that appears in the browser is just for convenience, whereas the figure that is stored is the one calculated by the server.

File uploads must be suspected of being malicious. When using wp_handle_upload() it is necessary to specify an allow-list of MIME types—for instance, JPEG, PNG and PDF—include a size limit and ensure that they are not stored in a directory from which the server can execute them. The visitors should never be made aware of any of this; they should just see a form that functions in the way they would expect.
Pricing Logic That Lives in One Function
When you sell a service or a configurable product it usually ends up having so many combinations that no one is willing to enter them all as separate products. For example, a print shop which has three sizes, four kinds of paper stock, two finishes and a rush option would have 48 combinations before taking into account a single quantity discount, and no one does create 48 individual products. In such a case they establish a rule.
In WooCommerce the rule is implemented through the use of a hook: the woocommerce_add_cart_item_data hook should be used to record the visitor’s selections, and the price should then be altered using the woocommerce_before_calculate_totals hook so that the cart, the checkout page and the order email all show the same amount. It is necessary to have the rate table in a single array or in a single settings page since a price kept in three different places will eventually contradict itself.
This applies as well to bulk-order breaks, regional delivery charges, discounts, add-on services and subscription options; the page thus ends up resembling a small web application. Using a Blogger store layout such as the Shopping – Store & Cart Blogger Template, the browser-side calculation can be prototyped with plain JavaScript; the real checkout, however, still needs a server to recalculate the total and it is there that WordPress is used.
Reaching Other Systems Through Their APIs
WordPress provides an HTTP client through functions called wp_remote_get() and wp_remote_post(), and it also has its own REST layer, which allows it to call other services and for those services to call it in return. Payment gateways, CRMs, email services, shipping-rate APIs, inventory tools, analytics endpoints and AI services all adopt this method. The benefit arises in cases where the information is already available elsewhere and does not need to be retyped.
With respect to Gumroad and a number of other payment services, I have used APIs and scripts in order to obtain the sales data, which is then used to update the content of the site. Three habits that I have transferred to WordPress are to use set_transient() to cache the responses so that a slow third party does not cause each page view to become slow, to keep the API keys as constants in the wp-config.php file rather than in the options table, and to set a timeout for each request because the server is more tolerant than the visitor is.
If instead you want to make your own data available, you should use register_rest_route() in conjunction with a real permission_callback; there is no point in leaving the permission_callback set to __return_true for anything that is private. Regarding permitting machine access to the standard REST endpoints, Application Passwords (which have been part of core since WordPress 5.6) are a better choice than sharing a human login.
Payments Are a Conversation, Not a Button
Through my own business I have acquired experience of using Gumroad, Instamojo, PayPal and the PhonePe Business API. The most important lesson that this experience has taught me is that a payment consists of a sequence rather than a ‘Pay Now’ button, the sequence comprising the customer, the payment request, the provider, transaction verification, the order update and customer confirmation.
Custom development concerns itself with the middle section of that process: your server generates the payment request, the provider then carries out the processing, and afterwards the provider calls your webhook. It is at the webhook that the order’s state should be changed, not on the thank-you page that the customer ends up on later, since customers are likely to close their browser tabs, lose their signal connection, and change the URL.
Since different providers adopt different methods for signing or verifying their callbacks, you should consult the provider’s own documentation to find out precisely which header and algorithm are needed and reject any callback that you cannot verify. You should save the original payload, construct the handler to be idempotent so that it will not cause a second order if the callback is received more than once, and then send the confirmation. WordPress does not have to operate separately from the payment system, but it must accept that the provider’s server has the authority to determine whether or not the money has in fact been transferred.
Chores That Should Run Themselves
The part that is most useful to me in my own work is the fact that I have created JavaScript-based automation and API scripts in order to get rid of repetitive tasks, for example those which read data from Gumroad and then update the content on Blogger; the same approach can be used with WordPress without any modifications.
A scheduled job can import records from an external service, update products, synchronise prices, process customer information, create or update posts, send notifications, refresh order data and prepare an internal report. In WordPress such a job is registered with wp_schedule_event() and is carried out through WP-Cron.
The sole disadvantage is that WP-Cron will not be activated unless someone visits the site, so a site that gets little or no traffic will carry out its tasks late. On a live site I would set DISABLE_WP_CRON to true in the wp-config.php file and have the web host use its actual cron job to call wp-cron.php every five to fifteen minutes. The objective is not to create a more sophisticated website, but to reduce the number of repetitive tasks for the person responsible for it.
Customer Areas and Download Rooms
WordPress handles the login process, and it is necessary to carry out custom development in order to decide what happens afterwards; rather than putting the customers’ purchases, downloads, orders, product updates, support information and account details on the standard profile page, the dashboard is used to show them.
In WooCommerce it is possible to add new tabs to the My Account page by using the add_rewrite_endpoint() function and the woocommerce_account_menu_items filter. Concerning digital products, the download links should expire and should be linked to the logged-in user not stay as permanent public file URLs which eventually end up being posted on forums.
The fact that I had been selling digital website templates for many years taught me what buyers of digital products want: they want to be able to find the item, pay for it, get the file and then use it without any problems. They never inquire as to whether this is done through a plugin, some JavaScript or an API.
Filtering a Big Catalogue Without Losing the URL
A market place which has hundreds of different designs must have ways of quickly reducing the number of choices. Although I have experience with a large number of website templates, having a wide variety of products on its own is not enough. Customers should be able to narrow the selection down by category, layout or feature.
The clean build is a REST endpoint that accepts taxonomy and meta parameters, carries out a WP_Query with a tax_query, and then returns JSON for use by JavaScript in order to display it in the grid. Use the history.pushState() method to update the address bar so that each filtered view has its own real URL which can be bookmarked and shared.
Start by determining which of the filtered URLs should be included in the index; in most cases they shouldn’t be, so use a canonical tag to send them to the main category and include the noindex instruction whenever the filters result in thin near-duplicates. In all other situations, the filter will unobtrusively give Googlebot thousands of pages containing almost identical information.
Security Rules Small Enough to Audit
I have installed Cloudflare Turnstile so that spam and automated entries will be kept out of the websites that I administer. However, with WordPress the widget carries out only half of the required function since the token generated by the browser has to be verified on the server; in this case you have to send the token along with your secret key to Cloudflare’s siteverify endpoint at challenges.cloudflare.com. A page that includes the widget but never verifies the token is simply ornamental.
In this instance the standard rules for WordPress code apply: when making a request which alters a state the nonce must be verified, current_user_can() must be invoked before carrying out any privileged action, sanitisation should be applied to any input and the output should be escaped using either esc_html() or esc_attr(), and $wpdb->prepare() should be used in any query which involves user input.
One has to exercise care when setting up a custom security code since a badly designed login limiter could cause genuine customers to be locked out and a file handler that is too lenient could provide attackers with something that the site had never given. Furthermore, any rule which is longer than one page of code should have it read by someone else.
The Plugin That Loads Everywhere
Adding new features is simple, but it actually takes skill to do them in a way that doesn’t unnecessarily slow down the site. I’ve invested a lot of time in handling lazy-loading with JavaScript and the IntersectionObserver, in dealing with lightweight custom scripts, and in resolving SVG and CSS problems, and the lesson from all these situations is identical: any processing that occurs on pages where it isn’t needed is wasted.
A typical instance of this kind of waste is a large plugin being loaded just for the sake of a single feature. A more compact custom solution could instead be enqueued only in those situations in which it is required. In order to achieve this, the function wp_enqueue_script() should be called within a condition such as is_page( ‘quote’ ), and as the last argument the array ( ‘strategy’ => ‘defer’, ‘in_footer’ => true ) must be passed (a feature that has been available since WordPress 6.3) so that the file will not block the rendering. Custom development might also spot stylesheets and scripts which do not need to load on every page and have them removed.
The same amount of importance is attached to images as to scripts. In the case of a lazy-load routine that makes use of the IntersectionObserver, the loading of images is delayed until the visitor has scrolled close to them; the opposite approach, however, is needed with regard to the hero image: it should not be lazy-loaded, it must have the correct srcset and sizes, and its width and height must be specified. The site has a separate article on the image aspect of this matter, titled Approve Hero Images at Real Responsive Breakpoints.
CRITERIA ANALYSIS: Plugin, Snippet or Custom Plugin
To put it more concretely, let’s take the example of the quote calculator that we examined earlier and compare three different methods of shipping it. Route A is a packaged plugin from another developer, Route B is a snippet put into the functions.php file of a child theme or into a snippets manager, and Route C is a small standalone plugin that is owned by you. The routes are assessed using attributes which you can check yourself.
First criterion: What occurs when pages which do not use the feature are loaded. If you go to the home page, look at the source code and search for the plugin’s folder name in the /wp-content/plugins/ directory. When a plugin is distributed as a package it generally enqueues its CSS and JavaScript files for the whole site unless there is a setting which stops it. Routes B and C can be set up so that they only enqueue on the right page, and Route A will satisfy this test only if the settings it offers permit loading on a page-by-page basis.
Criterion 2: The location where the data is stored and the method by which it is exported. You should verify whether the entries are stored as a custom post type, in the wp_postmeta table or in a custom database table. The export available through Tools > Export (in the form of a WXR file) contains posts, custom post types and their custom fields, but does not include entries from custom tables, which have to be exported using a CSV or JSON file of their own. A plugin that offers a CSV export is better than one that locks the entries into its own tables, and a custom plugin enables you to produce exactly the type of export you want, although this only becomes useful if you actually write it.
Third criterion: Licence and update terms. The plugins available on WordPress.org must be GPL-compatible, so licence problems are rarely a problem. You should instead examine the commercial terms to see if an annual licence includes only updates or also provides support, and what happens to the update stream when the licence expires. Snippets do not have a licence that can expire, but they also have no maintainer apart from yourself.
With regard to criterion 4, when the theme is changed the code in the theme’s functions.php file is removed. Since anything that needs to be retained through a website redesign—for example, pricing rules or order logic—should be put into a plugin, Routes A and C satisfy this criterion whereas Route B does not.
Criterion 5: On inspection of the user interface, count the number of entry points which require input—for example, forms, REST routes, AJAX actions, and upload handlers. Each of these should be accompanied by either a nonce or a permission callback. A custom plugin with only two entry points is easier to audit than a general-purpose plugin with forty, provided that someone actually performs the audit.
I would suggest using Route C in every instance where money or customer data is involved, Route B when making simple display adjustments are needed, and Route A only if the plugin passes all five checks without any resistance.
A feature that loads on every page but is used on one page is a performance bug, not a feature.
Structured Data, Canonicals and Everything Else Crawlers Read
I’ve spent a great deal of time working with Google Search Console in order to sort out indexing problems and unusual URL behaviour, and a lesson I’ve drawn from this is that a website which works correctly doesn’t have to be one that can be found. Because custom code changes what crawlers see, such code should be written with the crawlers in mind.
In this scenario, the developer has full control. JSON-LD (which is suitable for use with a Product, an Article or an FAQPage) can be output through the wp_head action, canonical URLs can be altered by means of the get_canonical_url filter, robot directives can be managed using wp_robots (starting from WordPress 5.7), and the main sitemap at /wp-sitemap.xml can be changed using filters such as wp_sitemaps_post_types. When it comes to custom post types, a rewrite slug must be chosen at the time of setting them up and then kept, as any further changes would necessitate setting up redirects.
The structure is set up before the code is actually written. For instance, in the case of a theme such as the Silo – Structural & SEO Blogger Template, the fact that it promotes the theme on the basis of its structure shows that, from the Blogger side, the heading hierarchy and the category structure are determined in the template before the very first post is composed. Likewise, with WordPress, you too should decide on your post types, taxonomies, and permalink structure before any feature code is written.
Server Rules: .htaccess Before PHP
There is no need for every type of WordPress change to be incorporated into WordPress; since I have dealt with WordPress sites and solved problems concerning migration and URL behaviour using .htaccess rules, I have discovered that an Apache-based redirect is quicker than one that is managed by PHP after WordPress has begun to boot.
Typical uses involve setting up 301 redirects for URLs which have been moved, enforcing the use of HTTPS, stopping access to wp-config.php, turning off directory listings, preventing PHP from executing in the /wp-content/uploads/ directory, and configuring the Cache-Control and Expires headers for static files. It must be mentioned, however, that not all web hosts use Apache; with Nginx the relevant rules are located in the server configuration, so you should ask the host before making any changes.
To avoid any problems you should first download a copy of the existing .htaccess file and never modify the section of code that WordPress has already included between # BEGIN WordPress and # END WordPress, as saving the permalink settings causes this section to be rewritten.
Treating a Blogger-to-WordPress Move as a Build Project
I carried out the procedure of moving Blogger sites to WordPress, having done it in hosting situations such as with Bluehost, and this experience caused me to change my view of migration since it is in reality a custom development project; the aspect relating to copying the posts is the simpler one.
The hardest part is the fact that search engines and users have already worked out what the old website was like. To start with, get the XML file from Blogger’s Settings under Back up content. URLs on Blogger are of the form /2024/05/post-title.html, and WordPress can copy this pattern by using a custom permalink structure of /%year%/%monthnum%/%postname%.html. Those pages marked as /search/label/Name must be redirected via 301 redirects to /category/name/, the ?m=1 mobile parameter must be addressed, and the feed at /feeds/posts/default also needs to have a destination.
The next items to consider are the images, the categories, the user accounts, the settings, the .htaccess file, the performance data, and all the third-party integrations that had been relying on the old site earlier on. In certain instances, the best approach is not to set up an exact copy. It could be a good idea when migrating the site to rebuild it in accordance with the requirements it has now. The hosting setup also has to be looked at carefully, and before coming to a decision it is advisable to read the article Choosing a Hosting Provider in 2026: What I Learned After Multiple Hosting.
Where I Would Not Write Code
The fact that something has been custom-developed does not make it superior. When a well-established plugin provides exactly what a website needs, there is no point in rebuilding it, since custom code will have its own maintenance duties relating to changes in the PHP version, updates to the WordPress core, and each future developer who will have to look at it.
The approach I take is to first look at the requirement; if there is an existing solution that is both reliable and appropriate for the project, then go with that. But in the case where the requirement is so specific that no off-the-shelf solution can meet it, custom development turns out to be the more attractive option and in fact the cheaper one over a few years.
DEPLOYMENT DIRECTIVE: A Custom Calculator on a Piki Templates Theme
The themes offered by Piki Templates are based on Blogger, meaning that the front end—which includes the markup, the CSS and a protected script—is the section that can be deployed; therefore, carry out the steps listed below in order and check each one before going on.
- Stick to the theme. From the Blogger dashboard, choose Theme, click the arrow beside Customize, select Backup and download the XML file, name it with today’s date and verify that it opens and is more than a few kilobytes.
- Prepare a test version; set up a second private blog, and then go to the Theme page of this blog to use the Restore function in order to load the backup. Perform each of the following steps on this copy first.
- Ensure that the viewport tag is included. To achieve this, go to Theme > Edit HTML, press Ctrl+F and search for viewport. If you see width=device-width, initial-scale=1; then good, but if you don’t see it, add the code within the <head> section because without the viewport tag phones will display the page at desktop width and your mobile CSS will not be applied.
- Make sure to include the markup. If you are viewing the post in HTML or in a Layout > HTML/JavaScript widget, then you should add a container such as <div id=”quote-calc” style=”min-height:220px”></div>. The reserved height is necessary because it prevents the page from jumping when the result is displayed, a feature that becomes important when there is an AdSense unit below the calculator.
- To write the CSS using a mobile-first method, start by setting the styles for a screen of 360px in width, set the font size for the input fields to 16px so that iOS Safari does not zoom in when an item is focused, and include one @media (min-width:768px) section for a two-column layout. The rules referred to above should be placed before the ]]></b:skin> in the Edit HTML page.
- Add the script referred to above within the </body> tag, wrapping it in //<![CDATA[ and //]]> since Blogger’s XML parser would otherwise reject a standalone && or < that appears within JavaScript. The script should begin with a guard statement: var box=document.getElementById(‘quote-calc’); if(!box){return;} and this statement should be included inside a self-executing function so that the script brings no extra cost to pages which do not contain the calculator.
- Simplify the calculation as much as possible by including all the rates in a single object at the top of the script, reading in the input values, and then writing out the total using the textContent property not innerHTML since visitors couldn’t inject markup into the page through a number field in that way.
- To save it and to preview the theme, select ‘Save theme’ in the Edit HTML section. If Blogger produces a parse error it will tell you the line number and the most frequent cause is an unescaped character outside of the CDATA block. Then, open the preview and check it at a width of 360px using Chrome DevTools.
- Take the measurements both before and after making the change. When testing on a mobile device, run PageSpeed Insights on a page with the calculator on it and on a page without the calculator. The Total Blocking Time should stay almost identical and the Cumulative Layout Shift should remain below 0.1, which is Google’s criterion for ‘good’.
- Send the request to a server that you manage. As a Blogger page cannot verify a Turnstile token or retain a quote, direct the script’s fetch() to a WordPress REST endpoint (for example, /wp-json/yourname/v1/quote), limit the allowed origin to your Blogger domain, verify the Turnstile token on the server and then recalculate the price there.
- Release it and submit it. Publish the page and then go to the Search Console, use the URL Inspection tool on that page and choose Request indexing. A week later check the Pages report for any errors.
What the Work Has Taught Me About WordPress
The experience I’ve had while working on Blogger has changed the way I now think about WordPress. For many years I was involved in creating themes and during that time I had to consider HTML, CSS, JavaScript, responsive design, loading speed and compatibility all at the same time; ever since then I’ve also incorporated APIs, automation, payment systems, Cloudflare security, SEO, migrations and troubleshooting into my work. This is the reason why, today when I look at WordPress, I view it as a platform that can be designed to match a business’s actual workflow rather than just being a content management system.
A bespoke site can include a specialised checkout, interact with external APIs, automate repetitive tasks, provide customers with a dashboard, calculate prices, filter large collections, integrate payments and improve security. Yet one should not add any of these features just because they are possible. The kind of custom development which I find useful is that which eliminates an actual problem, such as by introducing a new feature, replacing a heavy plugin with a lighter one, or establishing a connection between two systems which used to require manual intervention.
That is the real value of custom development: building WordPress to match how the website actually needs to work, rather than forcing the business to work around the limits of an off-the-shelf solution. That is where custom WordPress development https://www.yelk.io/services/wordpress/ shines—shaping the website around your operational needs rather than squeezing your business into a rigid, off-the-shelf box.